Indicators on Drywall Mudding You Need To Know
Wiki Article
How Drywall Installers Hamilton can Save You Time, Stress, and Money.
Table of ContentsHamilton Drywall Repair for DummiesWhat Does Drywall Installation Do?Getting The Drywall Installation To WorkGetting My Hamilton Drywall Installation To WorkFacts About Hamilton Drywall Contractors Revealed
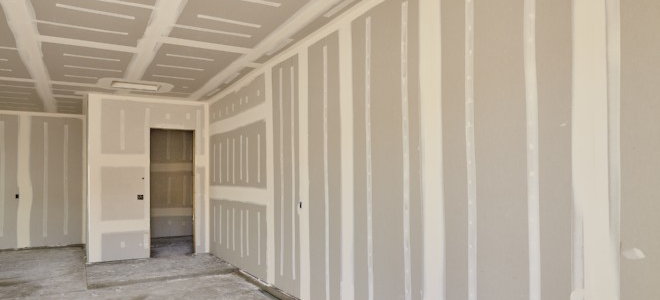
Mounting drywall is not rocket scientific research, but it will go much faster as well as look much better if you learn the basics prior to you begin (rather than after you're done). Drywall is just one of the easiest-to-use and cheapest construction materials worldwide. Also a severe error will certainly make you laugh, knowing you have actually wasted little time as well as possibly much less than five bucks.We'll show you the strategies and also devices the pros use to get the drywall job done quick and also in a manner that makes taping as painless as possible.
Puncture the paper support to get rid of the waste. To assist locate where screws will certainly walk around the space, mark the top plate whatsoever places where strapping or joists intersect the wall surface. Photo by David Carmack With an aide, raise the first panel into one edge of the ceiling (drywall installers Hamilton).
As the aide holds the panel, drive five screws, equally spaced, straight across the panel's width and right into the joist or strapping closest to the center of the panel. Utilize the marks on the leading plate to assist line up the screws. Maintain screws at the very least inch from all sides.
More About Drywall Repair Hamilton
Continue the row in same style up until reaching the opposite wall surface. Tip: Add a screw next to any screw head that damages the paper.
Mark that panel end where the measuring tape fulfills it and also videotape the range. Cover the box with an additional panel, and also attach it as in Step 3; do not drive screws any type of closer to the box than 24 inches. From the mark on the last installed panel, distribute onto the brand-new panel the exact same number of inches videotaped formerly, and note the place with an X.
Usage a measuring tape to make certain the initial panel's end will land in the center of a stud; if it will not, reduced the panel as in Action 2. With an assistant, hold the panel versus the studs so that one edge butts versus the ceiling panel as well as one end fits snugly against the abutting wall surface.
A Biased View of Drywall Installation
As symphonious 3, start screwing into a stud near to the middle of the panel as well as job external. Proceed hanging panels along the top of the wall surface, right over any doors and window openings. (The extra will be trimmed later on.) Make certain no joints associate a door or home window edge.Don't screw panels to the framing around the openings. Eliminate the button and also electrical outlet boxes following the very same procedure just like the ceiling boxes in Action 3: Mark package areas prior to covering them with drywall, taking care not to drive any type of screws closer per box than 24 inches.
Overlap this exposed end with the panel on the adjoining wall, to ensure that the edge is entirely framed in drywall. (With blueboard, the panel finishes do not overlap at outside corners; their ends land flush with the corner of the stud. This space will certainly be loaded later on with plaster.) Cover Discover More outside edges with a check this steel corner bead, cut to the elevation of the wall surface.
Attach the bead with 1 -inch drywall nails, hammered every 10 inches through the perforations in each leg to ensure that the legs are limited to the wall and the corner is not misshaped at all. Do the very same on the adjoining wall. Picture by Gregory Nemec Drywall specialist Paul Landry assumes that woodworkers frame wall surfaces so they are level and straight.
Hamilton Drywall Installation Can Be Fun For Everyone

On exterior walls, it's uncommon to find a stud that bows right into the room, since the sheathing holds it in area. When Landry does, his only selection is to power-plane the side of the stud back right into alignment. Photo by David Carmack After all the drywall has been installed, look for protruding screw heads.
BLOG POST a QUESTION or remark regarding the best methods used to install or hang drywall Exactly how to hang & complete drywall: This write-up explains suggestions as well as tricks that aid comply with the ideal methods when mounting drywall in buildings. We define the kinds of drywall as well as where best home renovation companies near me each kind ought to be made use of - Hamilton drywall repair.
This post series discusses and gives a best building methods direct to the selection as well as installment of developing interior surface area products, carpets, doors, drywall, trim, floor covering, lights, plaster, products, finishes, and sound control materials.
Hamilton Drywall Repair Fundamentals Explained

The builder or designer can play a vital role in assisting the homeowner select surfaces that are fit to the meant use, in addition to giving the structural assistance and preparation function the products require for great performance. Single-layer, 1/2-inch drywall is the default wall surface as well as ceiling treatment in many household building and construction.
Report this wiki page